
Tutorial: Gmail aliases
I always end up with some vanity domain and would like to send emails from them. There are different ways to achieve this goal. The following is free and simple.
Prerequisite
These notes presume you can receive emails to said address. Either forwarded or you have the ability to read them from elsewhere it does not matter.
There is a verification process later on where a code to be entered during the setup process will be sent to said email.
I personally use Google Domains and simply use the Email forwarding feature. Most domain registrars will offer email forwarding.
Setup
Preparation
Before we can configure the alias in Gmail, we will need to go create what is called an “App passwords”.
Technically, I think this step is only required if you use 2-Step-Verification on your account. I will presume you are and if not I will encourage you to look into it. Additional security of what is one of the most important assets you possess, your online identity, is very important.
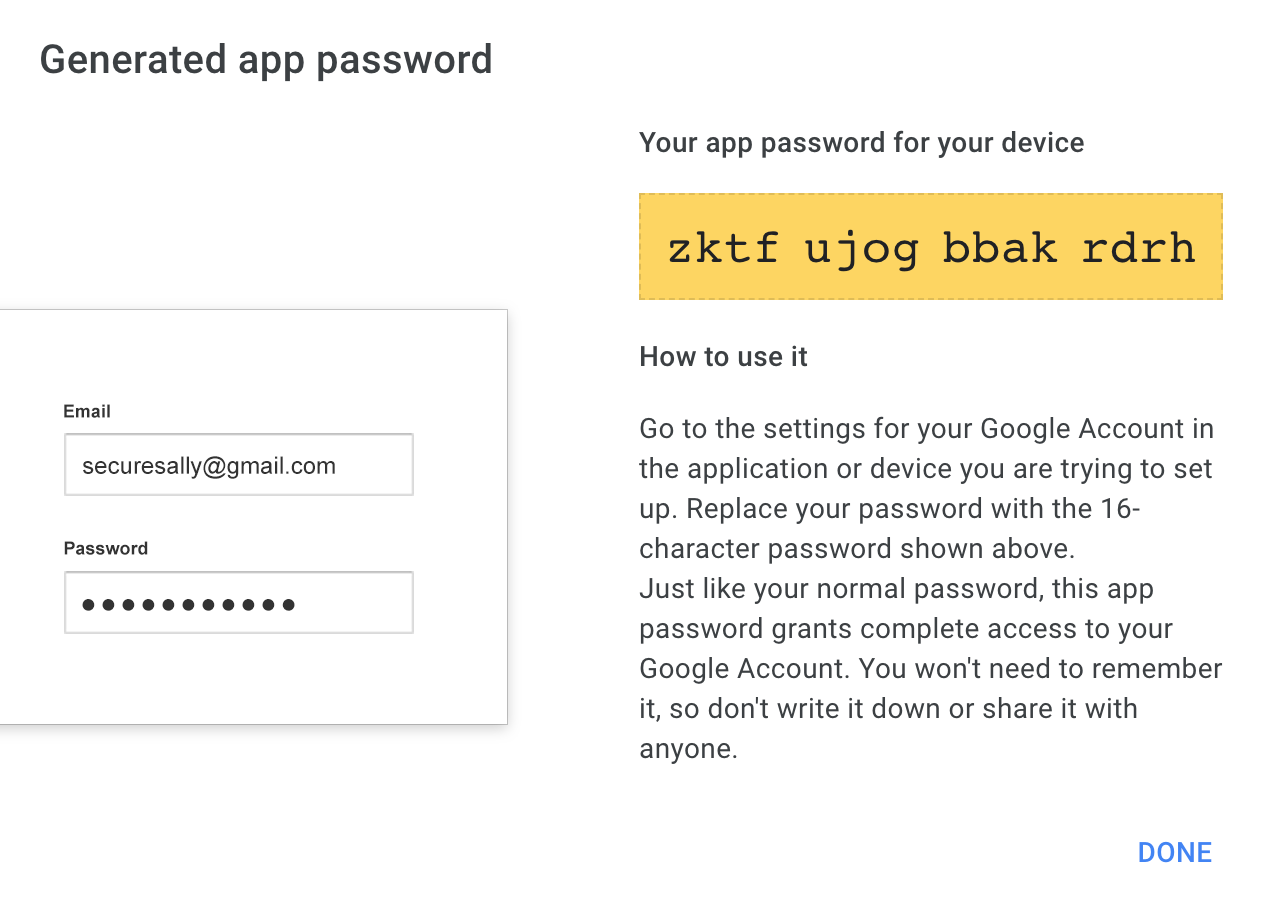
App passwords are 16 character long codes that can act as secondary passwords for your Google account. Their special characteristic is they bypass 2FA.
With great power comes great responsibility, you will want to use it during the alias configuration steps then make sure you delete any notes taken during the process for security reasons. You will not want anyone to stumble on this privileged key.
App passwords are created from your Google account, under Security in the “Signing in to Google” section.
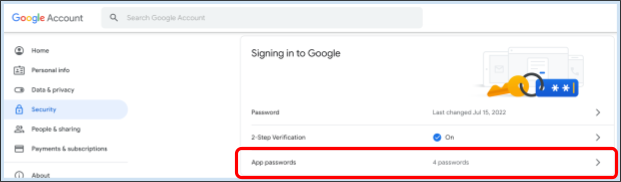
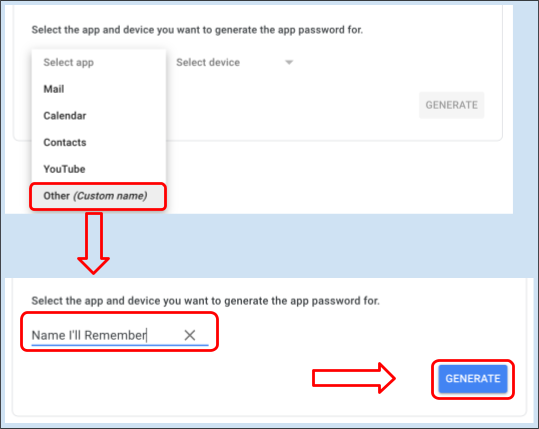
Follow the steps to generate an app password.
The reference name of the password can be anything you’d like. I personally use the alias email (eg.: “Gmail: alternate.name@customdomain.com”). It can be anything you’d like.
You now have an active application password. Keep it around for the next step.
Creating the alias
Step 1: Gmail settings
From your Gmail, go to your setting page.
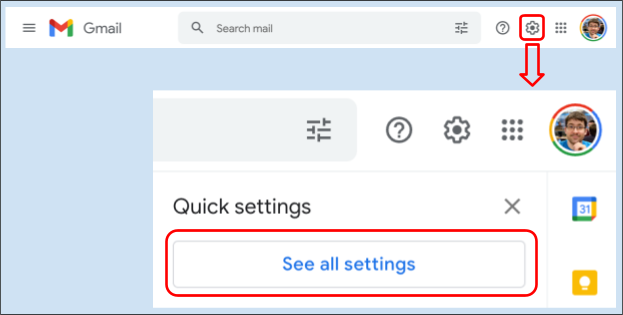
Then navigate toward the “Send mail as” option and select “Add another email address”.
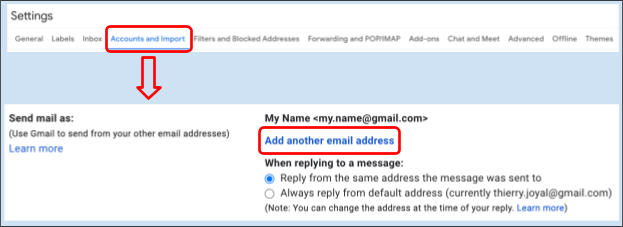
This will open a popup window where you will enter the different email settings.
Step 2: Email definition
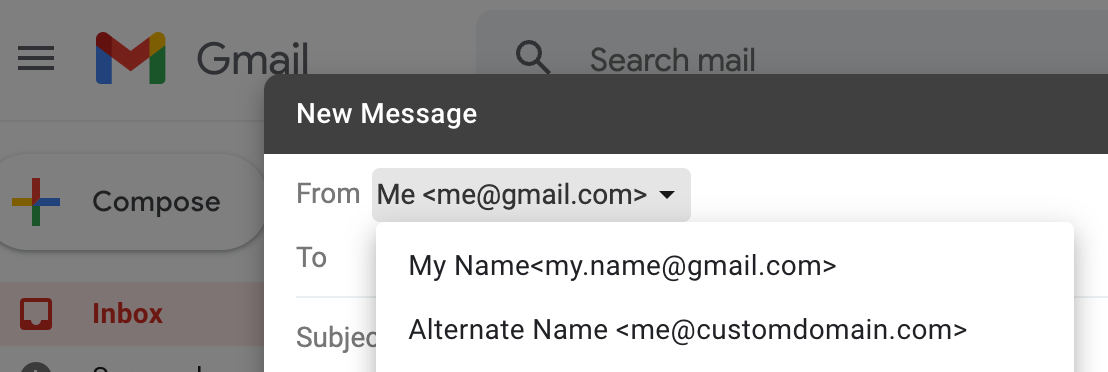
Enter your desired email display name and said email address.
Name: The display name.
Email address: The address of the alias.
Treat as an alias: This Google support answer will guide you as to if you need to select it or not.

Step 2: Credentials
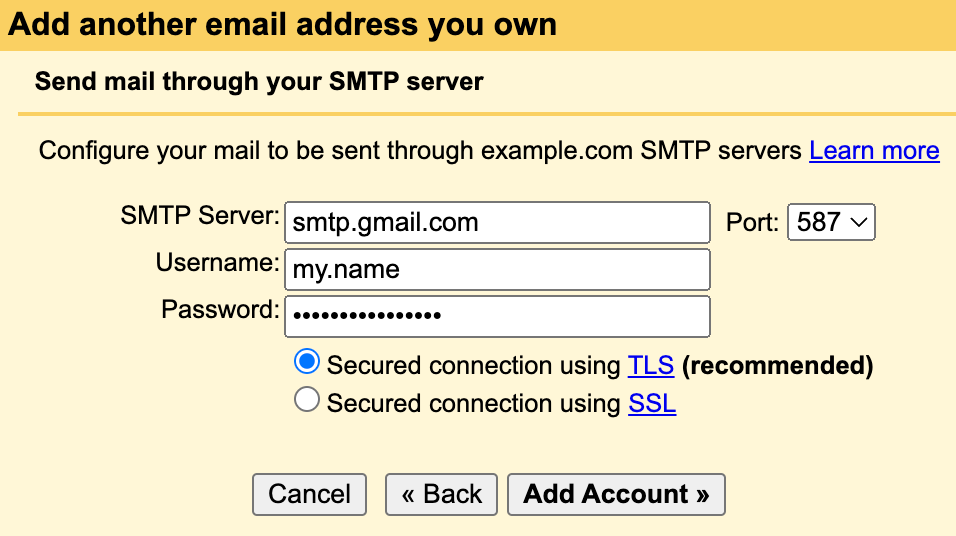
Fill in the account credentials.
SMTP Server: Should be smtp.gmail.com.
Username: The main Google account identifier (not the alias, without @gmail.com).
Password: The “App password” from the preparation step.
Step 3: Email confirmation
The process will ask you for a confirmation code. This code will be sent to the alias email and it is why it is important as it was mentioned in the prerequisite to have the ability to read it.
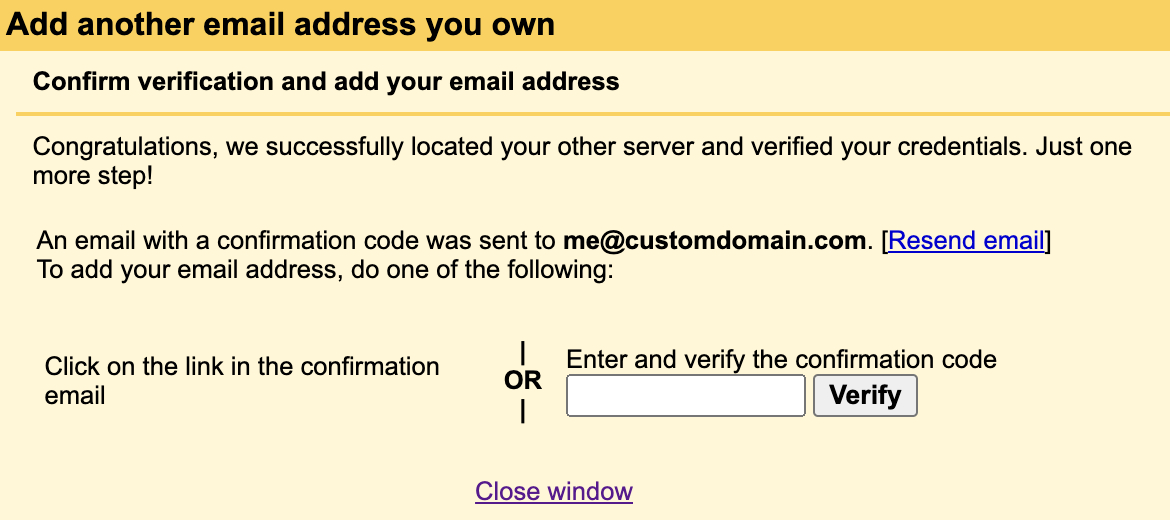

Once the code is entered, the alias will have been created successfully!